
How To Publish A Planner On Amazon – Print On Demand Notebooks With Kindle Direct Publishing Tutorial
If you want to learn how I created this blog planner and listed it on Amazon internationally, stick around and you’ll find out.
In the last couple of years, I’ve been teaching bloggers and small business owners how to create eBooks and other digital products to sell on their blogs to scale their online income.
Ebooks are a great way to educate your audience on a topic, but at the same time, you can offer your readers a physical resource in the form of a daily, monthly or annual planner to help them achieve their goals and self-motivate.
I’m going to walk you through exactly how to come up with a low-content paperback idea for your niche, create and design it and publish it on the print on demand service that Amazon has (KDP) in this article:
Why choose to publish on Amazon Kindle Direct Publishing?
When I started designing my 2024 blogging planner, I knew that I wanted to sell it in the physical form, rather than offer it as a printable or digital product.
It was imperative to me that people were able to handwrite and jot stuff down. Because when it comes to tracking your goals, writing down your targets and checking in with them, I find that it works so much better when you have a physical planner.
And because I had published an eBook with Amazon before, I knew that you can also publish stand-alone paperbacks for very good profits and with no upfront costs.
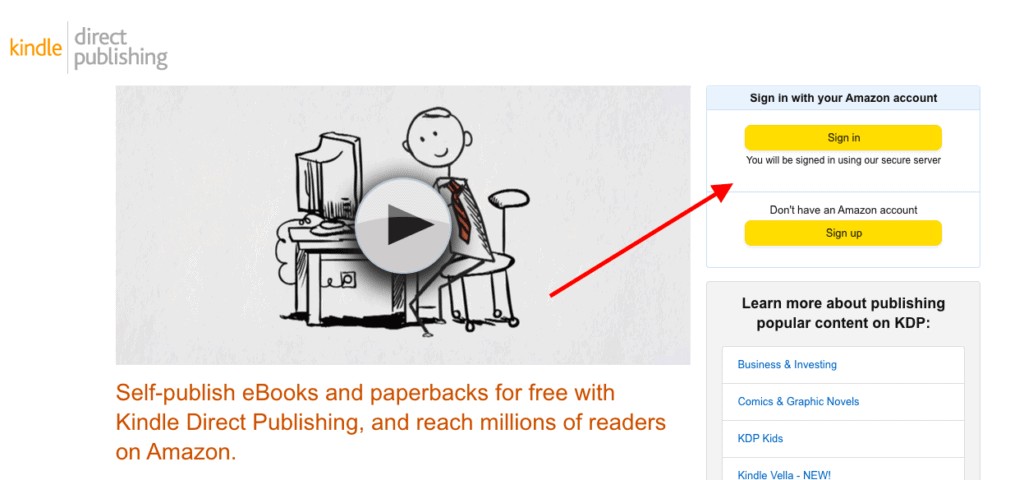
Their KDP program allows everyone to self-publish ebooks, books, notebooks and journals that are then printed on demand. No need to order a ton of copies in stock, or pack them up yourself, they do all the work!
Quick note: This post contains affiliate links and I am awarded a small commission (at no extra cost for you) if you purchase something through them.
Other benefits of the KDP print on demand service are:
- Free to get started with.
- You earn 60% royalties on all sales.
- Very low printing costs – depending on the size of your planner, you can pay as little as $2-$4 to get it printed.
- You get listed on a marketplace that has millions of users, buyers and visitors daily.
- You can scale your sales with Amazon sponsored ads, and reach a whole new audience.
- Orders are automatically fulfilled and dispatched.
How Much Does It Cost To Create A Planner?
You can design your own planner pages online for very very cheap, or even free.
It cost me $30-50 to design and publish this planner, and I’m going to walk you through the exact steps that you can recreate to publish a paperback in your niche or related to your blog.
Here are the tools I used to create and publish this planner:
- A Canva Pro subscription – I used Canva to design my planner, upload custom templates and fonts and then save my final work as a PDF. You can also use the free Canva account with some limitations. But you will need a PRO account for commercial licenses to fonts and designs used. I create my cover image in here as well.
- Design Bundles templates for planners – instead of creating my pages from scratch, I used, combined and modify a couple of existing Canva templates that I found here (and bought the commercial license for them that allowed to me to print and sell the final product). See more done for you templates here.
- Font Bundles – bought a couple of custom fonts and uploaded them to Canva.
- An Amazon KDP account – FREE to create. I already had one. I just paid around $10 for two author copies to be shipped to my address, to approve the final planner design.
Low content books are easier and quicker to create in comparison to eBooks, because you don’t need to research the content – just strategize it. Planners require some more design work (and I’ll show you how I made that easy), but you can also publish custom notebooks where you only need the templates for the lined journal pages.
But enough about my planner. Let me show you how you can create your own daily planner – in a step by step system.
5 Steps To Creating KDP Planners
1. Pick a theme and niche for your planner
If you want to come up with something that your audience will buy, the first step is to pick a purpose for your planners. What will people use it for? And who exactly are those people?
Research your niche. Ask your audience or pay attention to their needs and their wants when it comes to planners or journals, or even daily or weekly activities they engage in.
With low-content books, you’re basically creating the framework for people to fill in their own thoughts, ideas, and notes. So your pages and content need to serve that purpose.
The first step is deciding what kind of planner to create. Here are a few options:
- Daily planner
- Weekly planner
- Quarterly planner
- Annual planner
- To-do list organizer
- Personal planner
- Self-care planner
- Business planner
- Project planner
- Budget planner
- Financial planner
- Bullet journal
- Productivity planner
- Wedding planner
These are just a few examples, and you can combine them or make your idea more specific: for example – an annual planner for new moms, or a budgeting planner for future homeowners. Pick a purpose, and get clear on your audience at the same time.
2. Plan out the sections of your planner
Once you have that figured out, you want to plan out the sections of the planner and the pages in your head. Remember to make sure that the content in it serves that purpose you set out to achieve.
If you want your planner to make household chores easier to manage, add to-do lists, monthly charts, responsibility diver pages and so on.
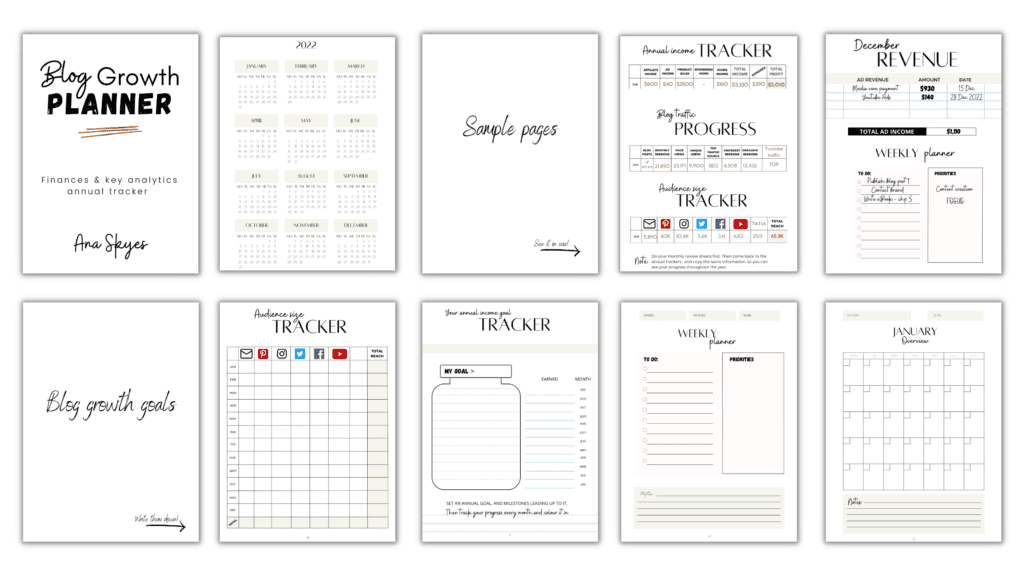
I modeled my planner after key statistics and spreadsheets that me and my blog clients were already using, so I knew the prompts, pages and goal-setting exercises in there will be helpful to my target audience.
On top of that, the beauty of creating a daily, weekly or annual planner is that once you have a specific section created, you can just replicate it for the remainder of the days, months, or years you want to include.
A really good tip for creating something that really helps your audience and that stands apart is to look at Amazon reviews of other planners in your niche or in similar niches. See what’s missing and what you can improve on. Then add it to your planner!
3. Create your planner for Amazon KDP in Canva
To bring your planner idea to life, you need to design and create your manuscript. Here’s how:
STEP 1: CREATE A CANVA ACCOUNT
The best tool you can use to create, design, and export your PDF is Canva.
You can get started with a free account, but I highly suggest upgrading to a Canva PRO account. That way you get access to crucial features that will make this step easier and quicker.
With the PRO account, you are also allowed to import your own fonts and templates.
NOTE: You are not allowed to use Canva’s free planner templates for KDP if you are planning to resell your planner. As tempting as that is, you can only use those for personal use. You need special commercial licences for the elements included otherwise, which is why it’s better to import your own fonts and create your planner individually.
STEP 2: PICK YOUR KDP PLANNER SIZE FOR PAPERBACK
Next up, you need to determine your planner size. This will dictate the size of your pages and overall design, as well as the size of the actual paperback that Amazon is going to print out for you.
This has to be chosen from KDP’s Print Options list.
This can be based on personal preference and it depends on how thick or big you need the planner to be. But when creating KDP planners for Amazon, you have to determine the exact dimensions of the pages now, and use those exact numbers in Canva, to make sure it prints out perfectly.
A few popular planner sizes for KDP paperbacks are:
- 8.5″ x 11″ (21.59 x 27.94 cm)
- 6″ x 9″ (15.24 x 22.86 cm)
- 5″ x 8″ (12.7 x 20.32 cm)
- 5.06″ x 7.81″ (12.85 x 19.84 cm)
- 8.27″ x 11.69″ (21 x 29.7 cm)
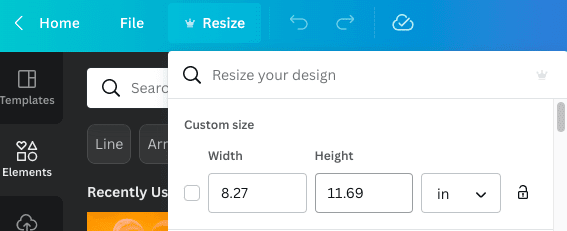
Once you’ve chosen a size, create a new project in Canva with those dimensions, or resize the file you are currently working on to match them.
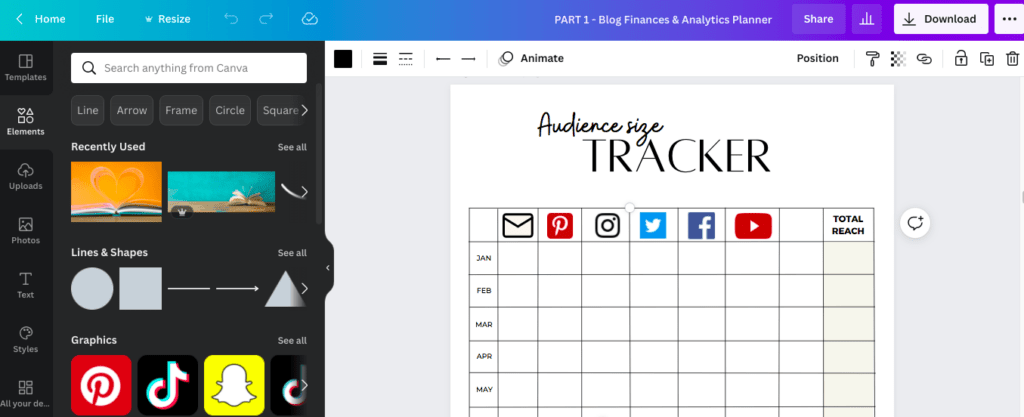
STEP 3: DESIGN YOUR PLANNER PAGES IN CANVA
Once you’re staring at the blank canvas in Canva, it’s time to start creating! This is where you design your own planner pages. Start with your cover page, content pages, dedication and intro. Then go on to create and design the sections that you planned out in the earlier step.
You can either create everything from scratch yourself (remember – you can’t use existing Canva templates from their library) or buy and import KDP planner templates as long as you’ve got the commercial license for them. That’s what I did!
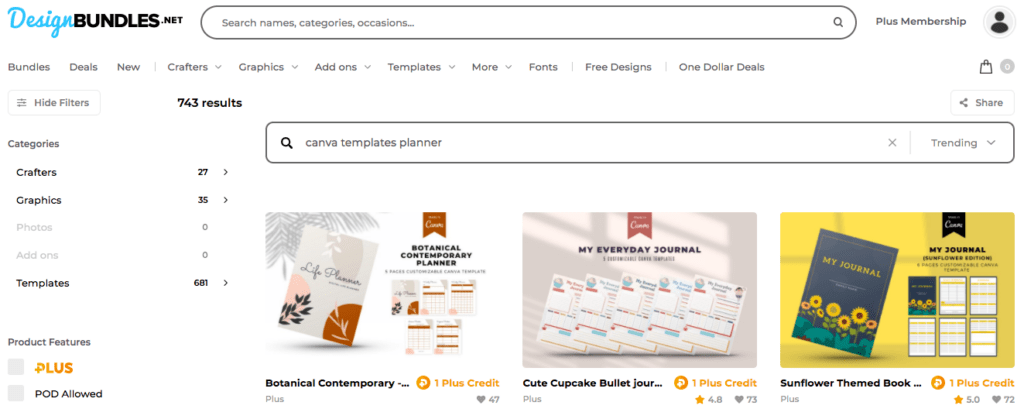
I went onto Design Bundles and found a couple of Canva KDP planner templates that I liked the style of, and bought them with the commercial licenses – which means the sellers are allowing me to use their work and modify it to sell in on Amazon.
Here are a few designs you might like under $10:
- 202 bullet journal pages templates
- monthly planner template
- social media planner
- 99+ pages for a bullet journal
I used a combination of several bought templates, alongside a few pages created from scratch to create my perfect planner.
I also went in, added my own fonts and elements, modified the existing pages to serve the sections that I had in mind so that the end result is not too similar to other creators who might’ve used those pages.
For repeating pages (like daily, weekly, monthly pages, to-do lists and so on), you only have to create them once, and then just duplicate and move the pages where they are needed.
But using templates to start off with saved me so much time because I’m not a certified designer.
STEP 4: EXPORT YOUR PLANNER AS A PDF
Once you’re happy with how everything looks, you can save your Canva design as a print-ready PDF.
Keep in mind that when you create Canva designs, you can have a maximum of 100 pages per design. That doesn’t mean your journal needs to be only 100 pages long. But if you want it to be longer, you need to create two parts of it and then merge them together as a PDF after. I used this PDF merger.
4. Create your KDP account & Amazon paperback
Once you have your final PDF manuscript, it’s time to create your KDP account and upload it there. Creating an author account is actually free and super easy to do.
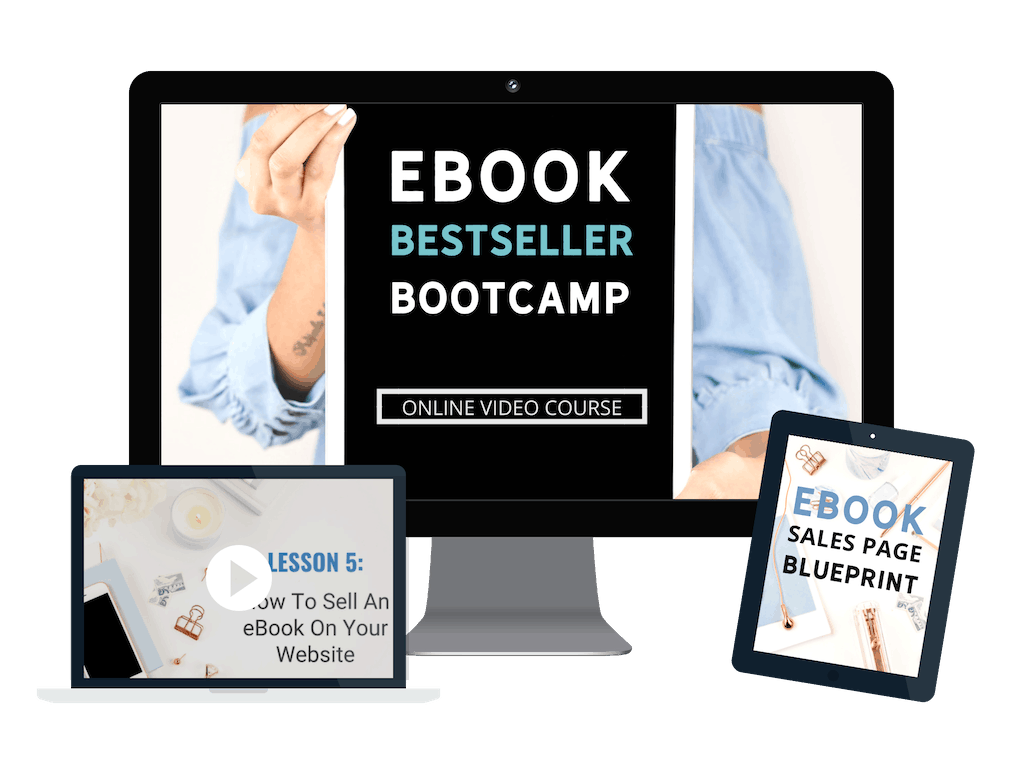
Just follow the steps laid out on how to create a planner to sell, or if you need extra guidance, check out my Ebook Bestseller Bootcamp course, because I walk my students through the whole process step by step.
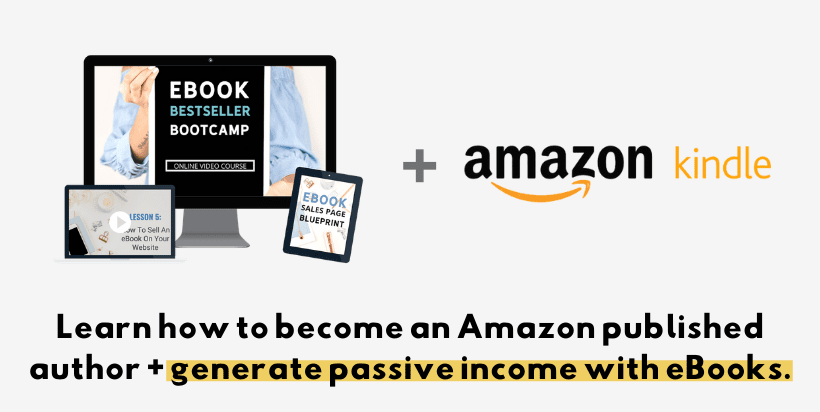
In this course, I also teach:
- How to create and publish profitable digital and paperback eBooks
- How to set up an Amazon description and book details that gets you ranked in search
- How to market your Amazon books to make passive sales in the long run
- How to create print on demand planners & books
- A lot more! Check out the full course curiculum here. Use the code “EBB50OFF” for a discount.
But if you already know how to do all that, you can skip right ahead to the part where you create your paperback in KDP, upload your manuscript, create your cover (I use Canva to create the main cover image, and use their cover builder to do the rest) and publish your planner.
Last but not least, you want to preview your file and make sure everything looks good and fits in between the bleed printable line. Amazon has an online preview that you actually are obligated to go through before they let you hit publish.
So you’ll be able to preview every page and approve the final manuscript. I also like to order author copies, and check everything on a test planner before launching.
Then voila! You have a physical planer that Amazon will distribute on your behalf that you can start promoting and selling on the spot. This is how to publish a planner on Amazon in just 4 steps.
And you also have a system and a process that you can replicate to create multiple planners, notebooks, eBooks or low-content books so you can build a passive income stream in addition to your blog.
- Come up with a profitable eBook idea (in your niche)
- Learn how to design, create and write an eBook quickly
- Get my entire system on how to publish an eBook on your website (or on Amazon!)
- Start getting paid in eBook sales in 30 days or less!
To learn more about that, also read:
- How to Sell Ebooks on Amazon and Make Up To $2,000 a Month
- How To Sell Ebooks And Printables On Your WordPress Blog With Send Owl
- How To Create Multiple Streams Of Passive Income With Digital Products
- How To Make Money Blogging – The Ultimate Guide
This is all great information and definitely going to save this page! What I am wondering is minor, but can you add tabs in your planners through Canvas? Thanks!
What kind of tabs?
Good question Jessica. Tabs that separate parts of your planner.
How do you design in Canva so that you won’t have problems with text and images going into margins when you upload the PDF pages in Amazon KDP?
Canva has margins and bleed settings that you can activate, that leave that space out automatically. I played around with that and only needed to do small adjustments after. But once you preview your design in KDP, they alert you of all pages that have issue – so it was easy to find what to fix and reupload my manuscript.
This is so well done, thank you for the information! I had decided to put together a planner for myself and my team at work, and then wondered if I could sell through Amazon. I created the forms for my planner myself through Word, is that okay or do I have to buy some sort of license to use the pages I created? I’m a total novice… Also, can I add National Days (like food days or fun days) and holidays to it, or are some of those things copyright? How would I know?
If you created the pages yourself, you don’t need any license to publish/sell the planner. That is only if you use elements (like photos, graphics etc) that were external to Word and require a licence. (This excludes free stock photos for example).
And yes – you can include any National Days, events and holidays. Those are not copyrighted.
Does this also exclude stock photo/elements from the free version of Canva?
When you print a planner with KDP, let say a 200-page planner with hardcover binding (casebound), how difficult is for paper/pages to lay relatively flat? I wish Amazon KDP provided a wider range of bindings, like bindings for lay-flat. Thanks Ana
I haven’t heard that being an issue. I just know that for hardcover books, they have the same print options as paperbacks, with a few exceptions:
There only have five available trim sizes and the minimum and maximum page count is 75 – 550 pages. But 200 pages sounds like the sweet spot.
Amazon offers a little more info on this here: https://kdp.amazon.com/en_US/help/topic/GAVW3FZZAKA2KY3B
But I recommend publishing your draft and getting an author copy sent out to review it.
Hi. I can’t see how to upload a terra off planner. It only seems to be paperback books!
A planner is a paperback book!
I already have a subscription and the experience in Adobe InDesign. Could I do all this just as well with InDesign? Or would you still recommend that I use Canva?
You definitely can – no need to pay for another tool! But InDesign is too advanced for some of us haha. If you have a good understanding of it, you can create something awesome!
Thanks for the valuable information! I want to ask that I’m from Pakistan, can I still publish my planner online?
Yes!